• Home
  • Blog
  • Photographing the Northern Lights
By Promote ShetlandNovember 9th 2021

If you're lucky enough to see the Mirrie Dancers blazing across a wintery Shetland sky, you'll most probably want to capture the memory in a photograph. Richard Ashbee is a Shetland-based photographer and here he shares his guide to capturing the Northern Lights.

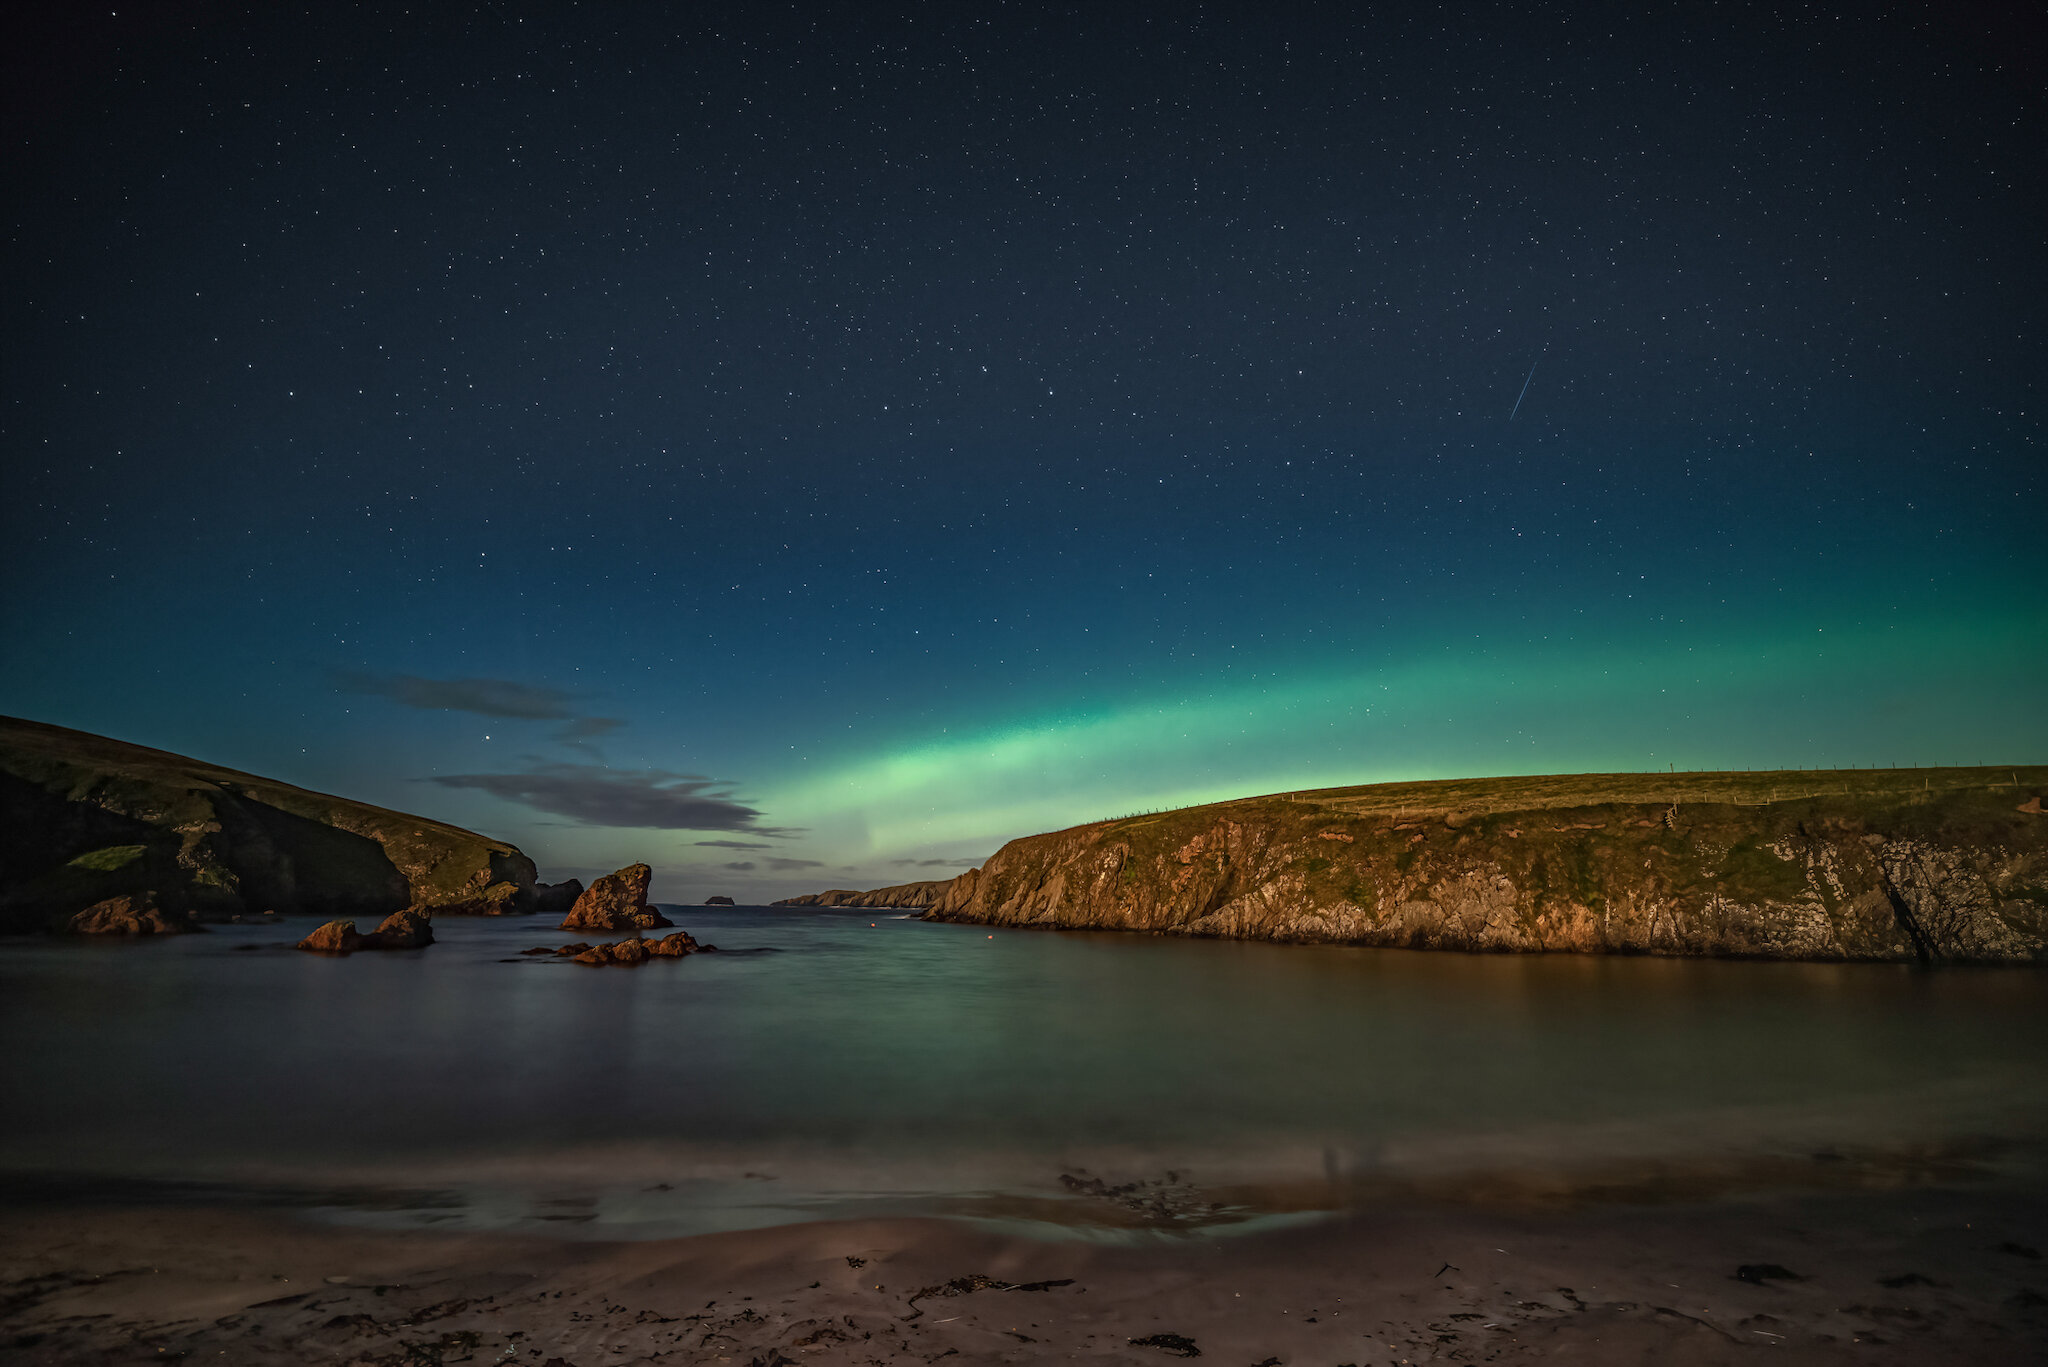
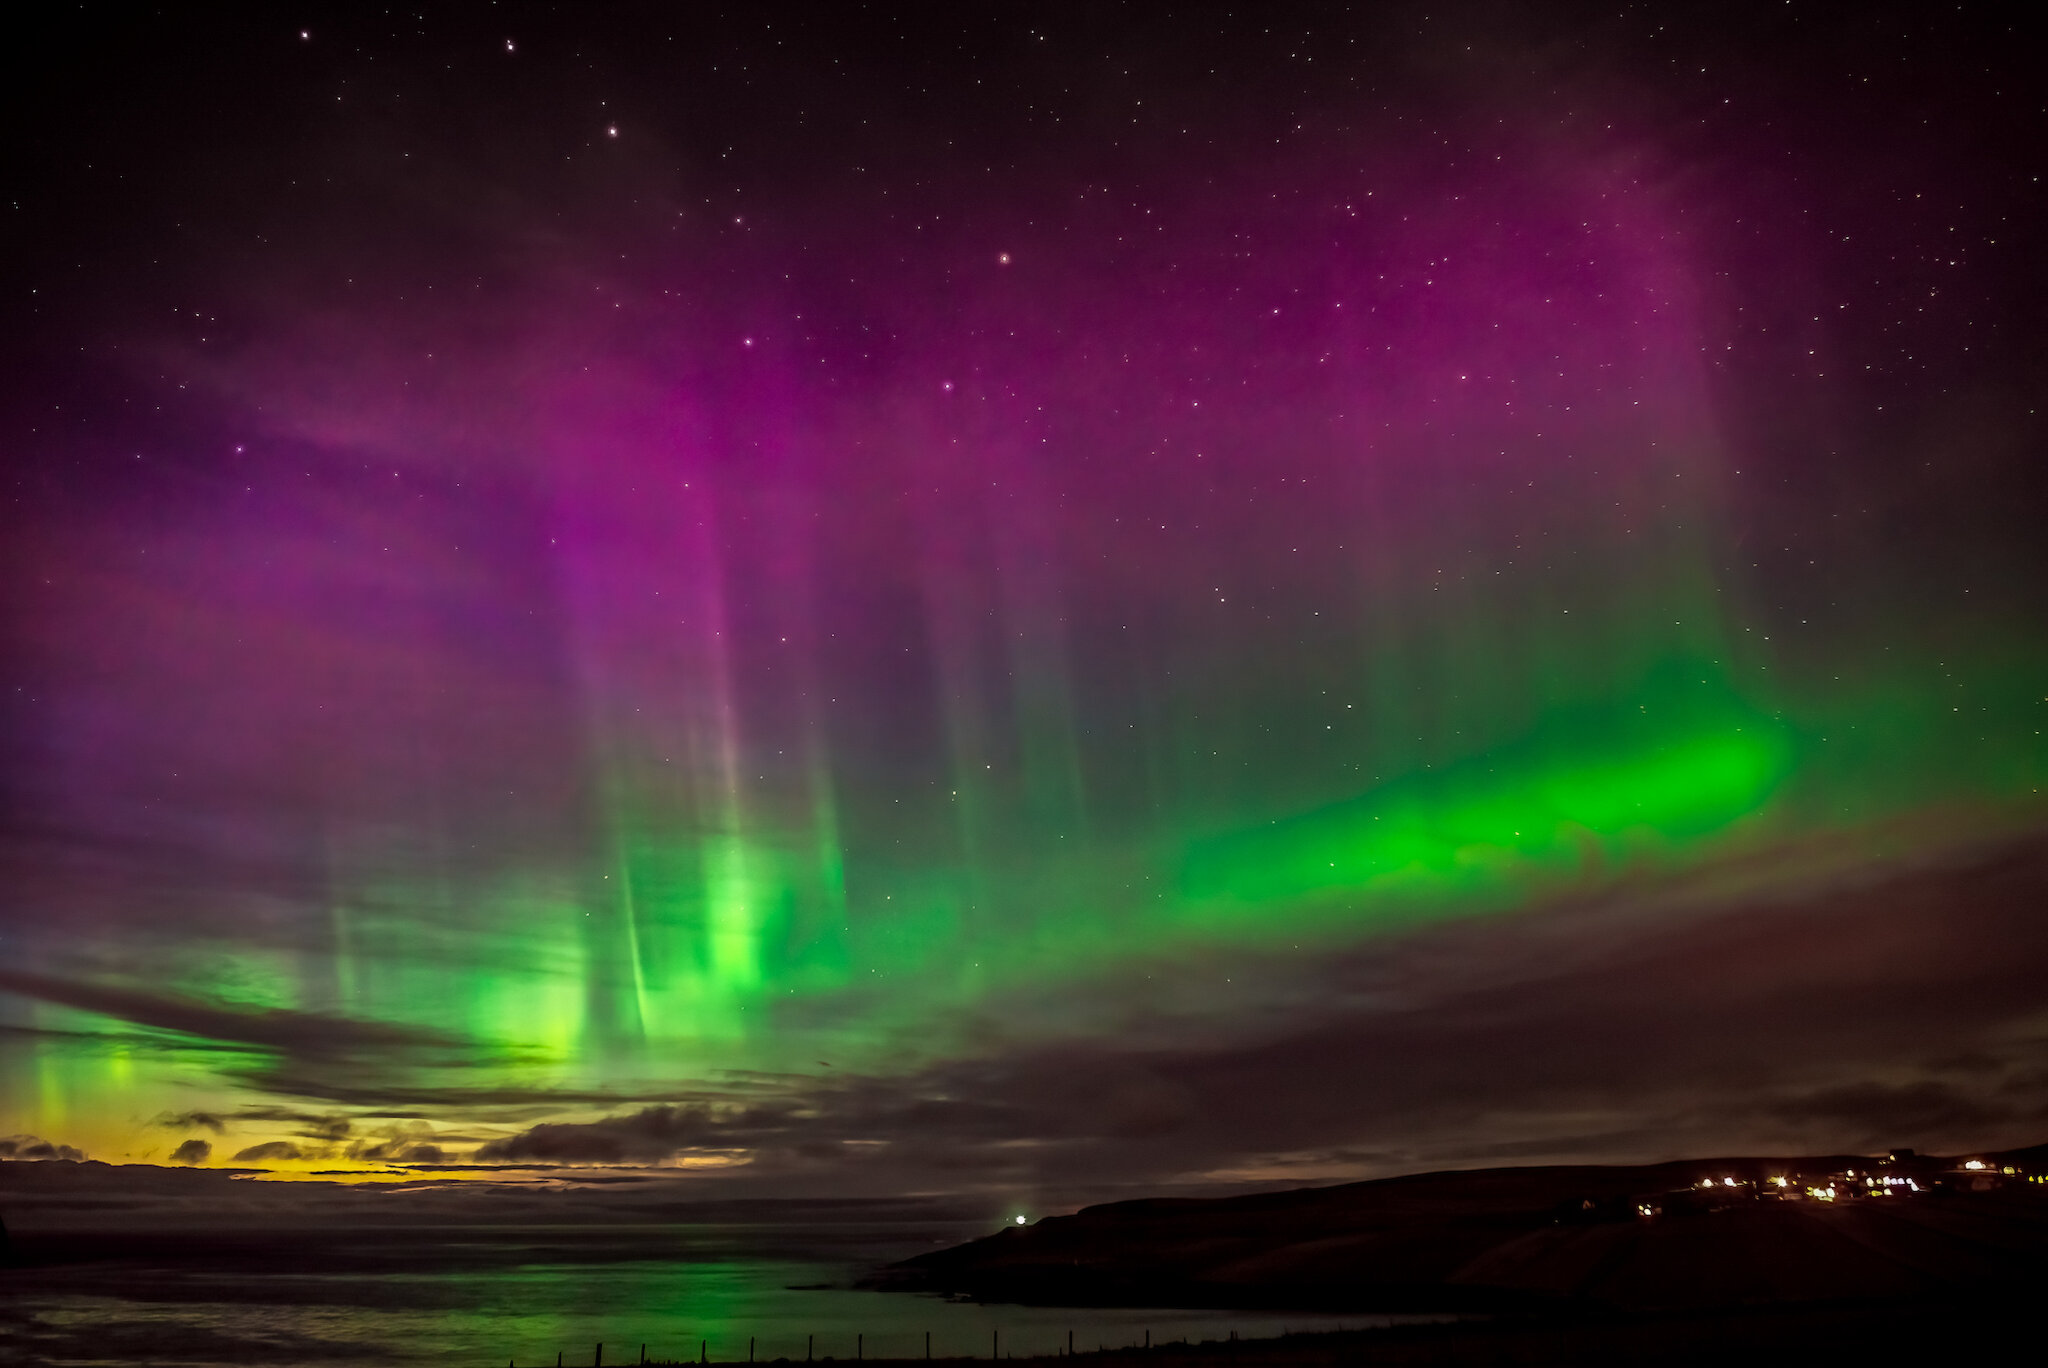
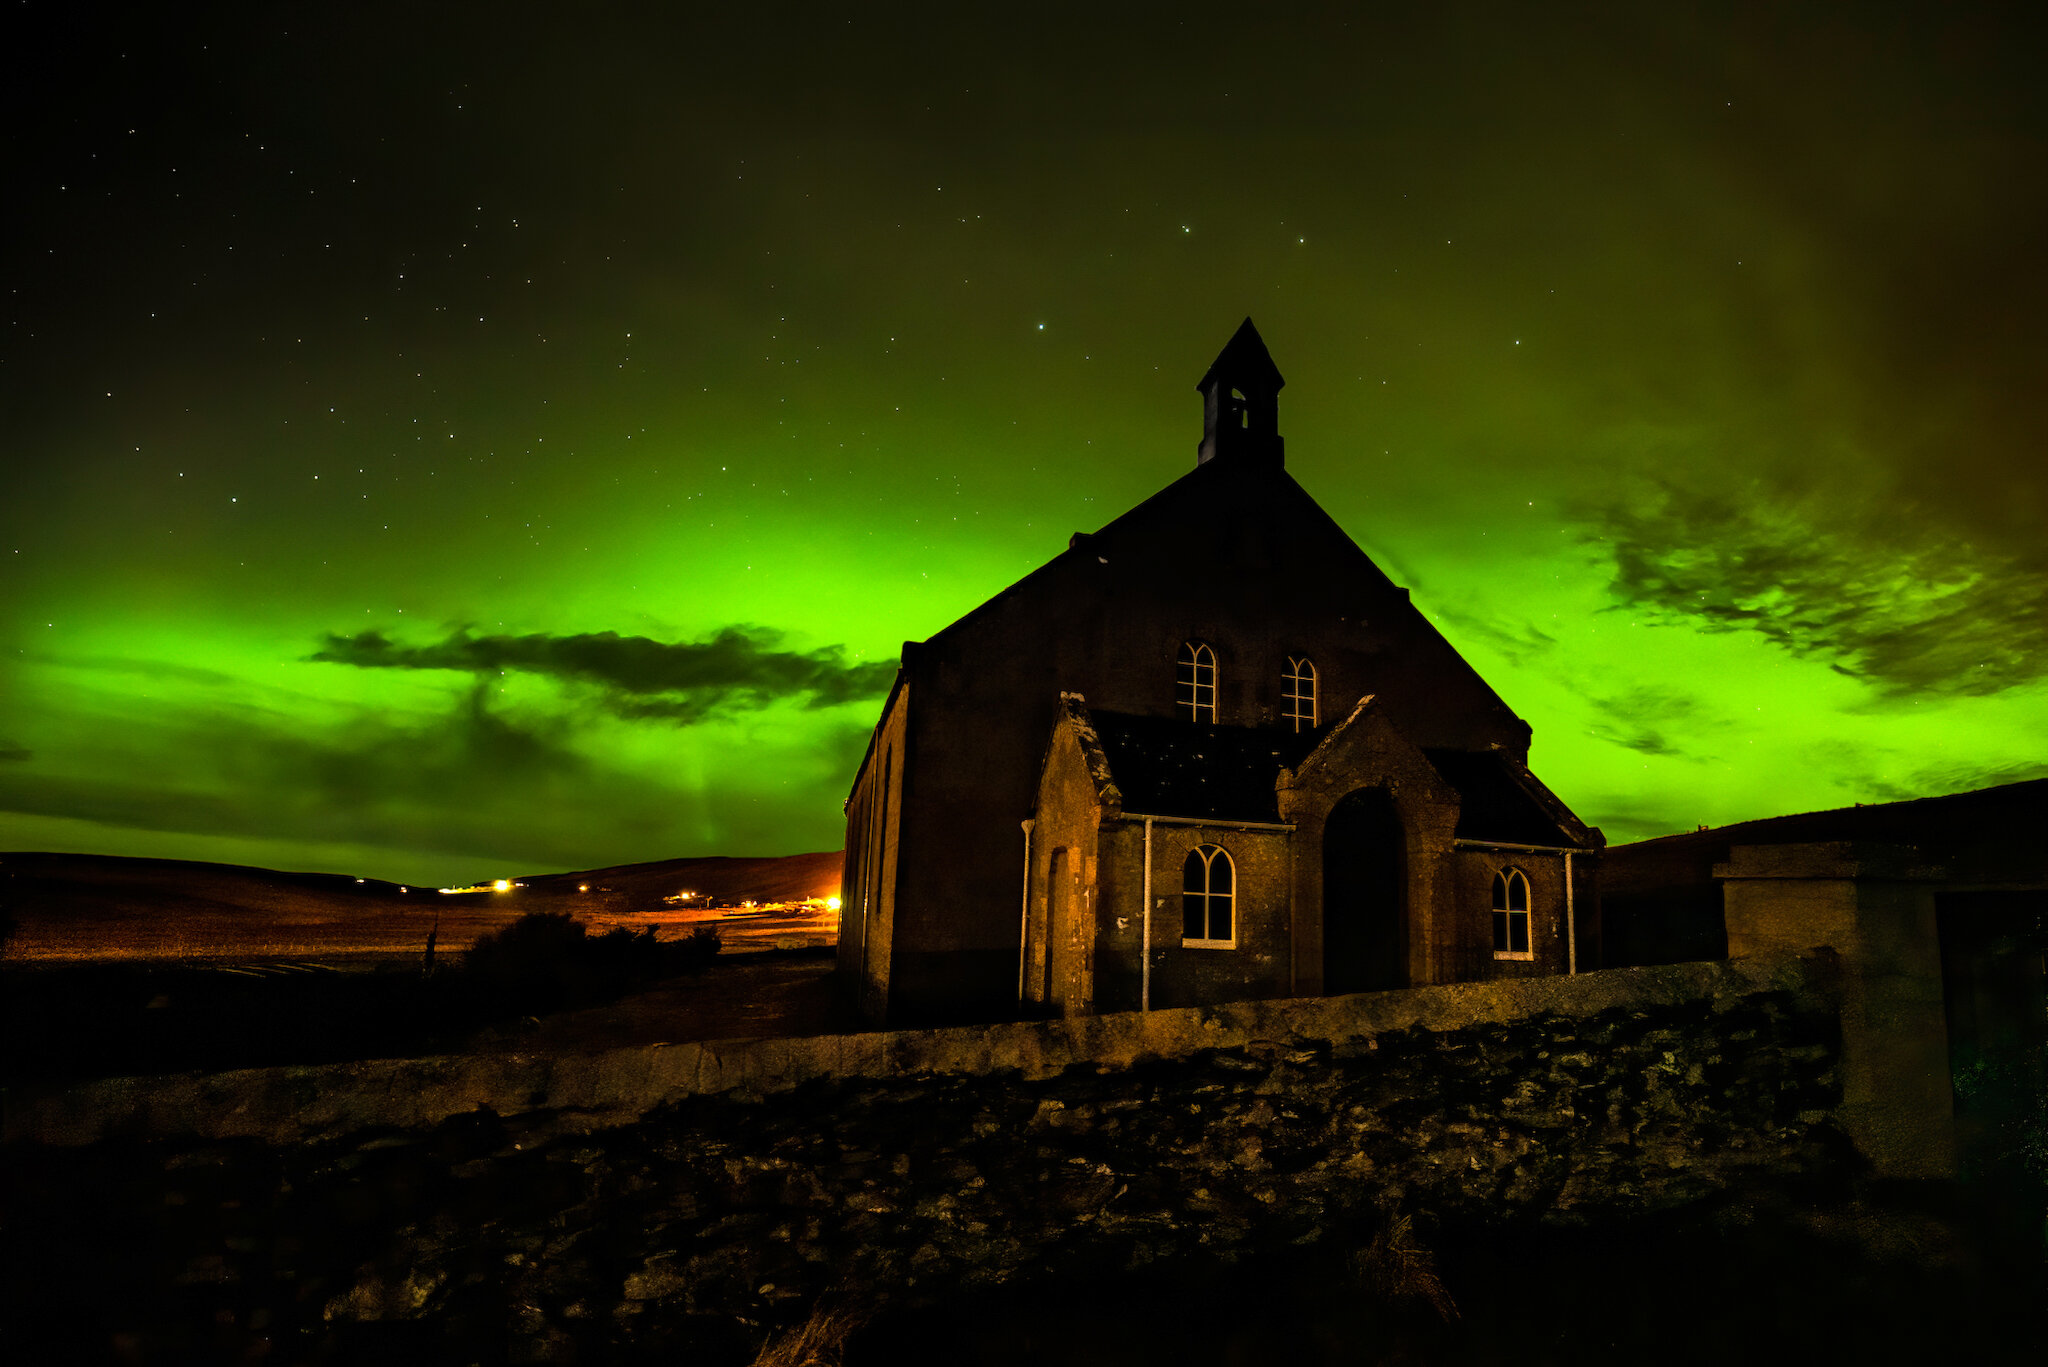
Photographing the Mirrie Dancers, or as they're more commonly known, the Northern Lights, takes a bit of practice and patience, but when you do you'll have a keepsake of one of the world's most awe-inspiring phenomenon.

To get started, you'll need: a camera, a wide angle lens, a tripod and a cable release.

1. Start by planning

Make sure you take time to visit your chosen aurora location in the day, take some sample photos looking north, this is where the aurora will show. Choose a location with a low horizon, just in case the aurora is not very active, and check you have no telegraph poles in the shot. Also, see whether you can include any interesting foreground which will enhance the photograph. Look for reflections in a loch or a calm sea, interesting buildings, possible silhouettes, and sheltered positions if its windy.

On the night, check your shadow doesn’t show in your photo if the moon is low behind you.

2. The ideal camera

You'll need a camera that you can manually operate and manually focus. Set your camera to Manual on the dial (M), this means you will have full control and must alter the shutter speed, aperture (F/number) and ISO, manually. Auto settings are ok for daytime photography but not for photographing the aurora. You'll also need to manually focus your lens.

Even some top-end smartphones can capture images of the aurora, but you will still need a tripod. While mobile phone cameras are convenient a DSLR (Digital Single Lens Reflex), or Mirrorless camera will produce better photos.

Most people assume that the more megapixels a camera has the better it will be, but for night sky aurora photography this is not the case. A camera with 12-24mp will be a good start. The larger the sensor the better, this is why full frame DSLRs and Mirrorless cameras will provide you with the best quality images. This is because larger sensors collect more light.

3. Set up a tripod

A sturdy tripod is essential as you will be taking long exposures. Wind is always a problem in Shetland so you could shield the tripod/ camera with your body or if your tripod has a hook on the centre column attach a rucksack to add weight.

Make sure your battery is fully charged before going out. I've come across many people who are only able to take a few photos before the battery is flat. Night photography in cold conditions also uses a lot more power.

4. Get in focus

The wider the camera lens the better, a 14mm lens is a good option. Focus is critical to a good aurora photograph. One way is to set the lens to manual, then focus on a distant object during the day, take a photo and check for sharpness, then tape the lens barrel so it doesn’t move. Using the infinity reading on your lens (figure 8 on its side) rarely works.

Another method is turn live view on and then focus on a distant house light at night, again on manual focus. Use the magnifier to check focus then take a few photos making sure they are sharp. Sharp stars will enhance your aurora photo but if they are out of focus, they will be distracting.

Using the correct camera settings will be crucial to capturing stunning aurora photographs.

Unfortunately a high ISO will produce a lot of noise, so you will need to know your own camera limits, keep this as low as possible. Noise shows as splotches of colour or spots often showing a discolouration. Use a daylight, white balance.

5. Useful tips

If the aurora is showing no movement and the moon is about 25%, this is a good starting point (using a 14mm lens):

  • Using a full frame camera- ISO1600 F2.8, 25 seconds
  • Crop sensor camera – ISO1600, F2.8 , 20 seconds

If the aurora is moving rapidly (using a 14mm lens):

  • Full frame ISO6400 F2.8, 5-2 seconds
  • Crop sensor ISO6400, F2.8, 5- 2 seconds

You will need to reduce your speed from 25-20 seconds to about 5-2 seconds to capture any movement in the aurora. This will reduce the amount of light entering the camera but normally a very active aurora is brighter than a static one. More camera settings and photos can be found on Shetland Aurora Hunter Facebook group.

Things to remember
  • Don’t forget to charge your battery before heading out
  • Don’t overexpose the photo
  • Keep ISO as low as possible
  • Get away from light polluted areas, the darker the better
  • Don’t fiddle about with the settings; get to know how to change your settings in the dark. Keep the lens wide open
  • Make sure focus is accurate
  • Don’t pack up too early

Another thing to consider is to reduce the brightness of your LED screen, this will give you a more realistic preview.

Try and take photographs in RAW, this will give you the best quality images of the aurora. You will be able to recover detail in the highlights and shadows. If you use Jpeg, then the camera has to reduce the size of the image. The only way it can do this is to throw away information such as colours, so you may lose seven out of 10 shades of green, which might leave the aurora colour looking flat. The camera will also sharpen the image, in most cases too much which will increase noise in the image. Also there is less opportunity to recover detail in highlights and shadows.

For more on photographing the Northern Lights, check out Richard's book Shetland Aurora Hunter (RRP £16), available to order by emailing shetlandaurorabook@gmail.com